

Buying a property has its own challenges. Building your own from scratch has even more. But renovating an existing building is on a whole other level of complex. It’s also on a whole other level of rewarding. It’s your chance to bring something back from the brink of total disrepair, to restore a piece of history, to create a dream space or possibly develop something more unique than Elton John’s seventies dress sense.
But, like we said, before you get to this stage, there are a whole bunch of challenges you need to overcome first, and that means spending a serious amount of time preparing before you do anything else. We can’t stress how essential this is, and that’s because renovation work needs to be tackled in a logical order. It’s not like other construction projects where you can adapt your processes to fit in with the weather, delivery delays or anything else of that ilk. Research on items even as simple as ceiling tiles, is necessary.
Stray away from the correct processes and you may well end up with a mega-migraine. We’re talking about completely undoing the work you’ve done to take on the repairs and improvements you should have done at the beginning of the project.
With this in mind, we’re going to walk you through the property renovation steps that will keep your project out of trouble and your dream intact.
1. Preparation Is Imperative
There is no way you can - or should - make an offer on a renovation project without having a team you can trust in place already. This isn’t just because you need to feel totally comfortable and confident in the skill set of your chosen contractors and their workers, but because you’ll want to take an expert renovator to the property with you to get an idea of issues, problem, complexities and, above all, costs. We’re talking about both an architect and a builder, both of whom will look at the project from different points of view. Once you have their input, you’ll also be able to reflect this in the offer you make, meaning your budget won’t feel the stress or strain of miscalculation. After all, the number one rule in construction is: have a budget and stick to it no matter what. This means working out what will need doing to each room, what structural work may be required, whether underpinning is on the cards, what finishing touches will be needed and then adding a 10% contingency for unforeseen costs.

2. Concentrate On The Condition
Another major matter on the renovation front is knowing exactly what you are up against before you start. That means making a detailed assessment of the buildings current condition to avoid any nasty surprises. You need to determine if items can be repaired or need to be replaced like a tub or Toilet Repair or Replacement. Our advice: educate yourself as much as possible and bring in a professional eye. How do you do this? Simple. Start by getting clued up on issues like concrete restoration and post-tensioning by reading informative blogs on it, like the Tendon LLC Blog. Once you’ve done this, spend top dollar on a thorough survey. By already being somewhat clued up on the issues, you will have some idea of what a surveyor is talking about, as well as accurate plans and a detailed report on issues like damp, infestation and subsidence. The point is this: a building that needs restoring will have been left empty. That’s almost always the case. That means it will have inevitably started to deteriorate and will continue to unless you make it watertight by covering the windows, doors, and roof. If the roof is quite deteriorated, residential roof replacement services in Sarasota, FL might be necessary. The process of updating the condition of the surrounding property could also be of concern and should be surveyed. If water has traditionally leaked into the building, drainage contractors might need to be called as well. You may also want to put in temporary structural stabilisers while you finalise plans; things like scaffolding around the building that is going to be worked on and steel ties inside to stop lateral shifts.
3. The Design is Everything
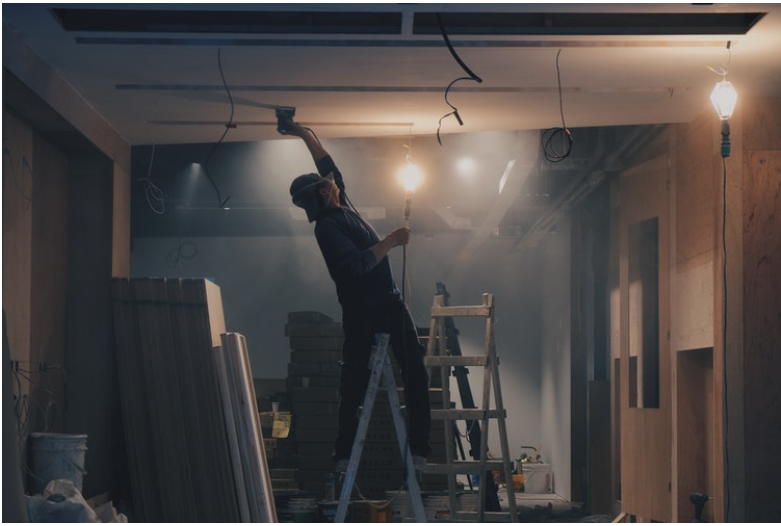
There may have been a few headaches by the time you get to this stage, and that can make you want to get cracking on as quick as you can. But try and resist the temptation because it’s worth taking your time to create the perfect design, one that will meet all your needs by the time the project is finished. You’ll want to work carefully with the architect to know how the new renovations will work with the original building, how they will blend and compliment one another or drastically transform it. Fixtures and lighting need to be integrated into the design and whether you are looking at lighting installation in Derry, NH, or plumbing in a new bathroom in New York, plan on using professionals to both design and complete the work.
4. Next Stop: Consent-ville
Another reason why the plans and designs are so carefully considered is you’ll have to apply for consent or, at the very least, recognise which aspects of your proposed renovation might require statutory consent. A lot of this may be things you never considered before, things like whether the property is allowed to be used as a dwelling or for commercial use, or whether you will have to apply for a change of use. It might be a listed building or it may be in a conservation area. It might even be that no statutory permission is required at all. Whatever the case on the consent front, you will still want to ask your architect to walk you through the minefield of building regulations, which range from drainage and waste disposal to party wall agreements with neighbours.
5. Safety & Security
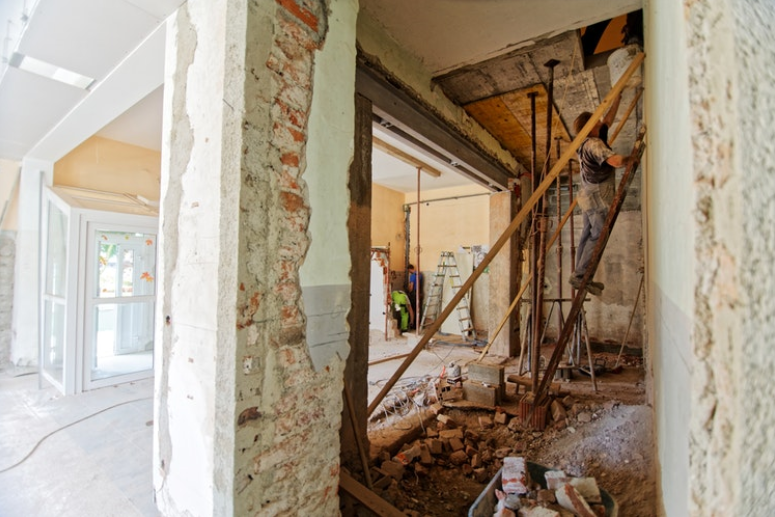
Once everything has been given the thumbs up and renovations can begin, the first thing you will want to do is make your site area as safe as possible. That means getting a risk assessment and then developing an approach to demolition, from structure down to hazardous waste (yeah, we’re talking about asbestos). That’s just part of the safe and secure process too. There will also need to be site insurance, something that is usually covered by your contractors but it might be that you need to arrange this yourself. If that is the case. Make sure you get all-site cover, which includes public and employers liability insurance amongst other things. Before you perform any form of demolition, however, make sure you know exactly what you are doing. Make sure you aren’t ripping stuff out or tearing things down that would be considered illegal, make sure gas and electricity have been totally turned off and, for the sake of your budget, make sure you salvage anything that might be worth something. Buildings that require renovation are often old and so you’ll be surprised what treasures can be saved and sold.
6. Renovations May Now Begin
By this point, any issues, risks and instabilities should have been unearthed and dealt with, as well as measures to protect the more vulnerable parts of your building. This means the bigger renovation jobs can start to be undertaken, starting with groundworks, foundations and drainage. After this, the modification processes can be made. Repairing wall structures, adding support steels, putting up extensions and conversions, laying down concrete floors, putting up walls, a total overhaul of the roof and finalising the spaces for both windows and doors. Another big part of this stage is insulating in accordance with regulations, damp-proofing properly and making sure both ventilation and drainage are up to modern standards. Trust us, you’re contractors and site workers will be thrilled when the heating can be turned on for the first time since they arrived at the project.
7. Absolutely Weather Tight
There are a whole host of jobs that can only be done once weatherproofing has been completed. Plastering, electrics, joinery, carpentry - they all need a desert dry building in order to be done to a safe and secure standard. That’s where the roof and windows come into play. They are the most essential parts of sealing a property, followed closely by chimney stacks, doors, guttering, lead fastenings, fascias and cladding. All of these need to be done to finished standard, especially the parts up high. The doors, however, they can be wrapped in a temporary solution without too much hassle.
8. Finally, It’s First Fix
For those who don’t know, the first fix refers to the internal layout going up. That means stud walls being erected, staircases getting installed, window sills and door linings getting installed and just about doing everything that will let the plasterers crack on with their skills. After this, the next stage can commence; electrics and plumbing. For the plumbing, you’ll see hot and cold pipes get installed, drainage and pipes of all sorts get tied in. It will also be a time where bathrooms and kitchens get finalised because everything will need to know its place - basins, baths, sinks, showers, toilets, washing machines, dryers, dishwashers, underfloor heating, everything. They may not be fitted now, but the pipes need to be in place. As for the electric, this will include everything from lighting cables to internet, phones to plug sockets.
Once all of these have been finalised and finished, it will be the battle of finishing touches, tying up the loose ends and working through the ‘snag list’. Trust us, this will take a lot longer than you imagine it could so exercise patience. Another thing worse mentioning is the need to invite building inspectors to your project right the way through so that you don’t stray into grey areas unwittingly and have to redo the work.